Migrating My Home Server from Arch Linux to Fedora 30
This is outdated, and many information here is not applicable. Refere to the updated version here
Why Migrate the Server?
Arch is an amazing linux distro, but being cutting-edge is the opposite of being stable. For my home server, I don’t need the latest and greatest as much as I need a stable server that does what it does with as less maintenance as possible. Hence, Archlinux is to replaced with a more stable Fedora distro.[Yep, I hate Ubuntu – though I believe it is a good distro all-around .. just don’t like it, personally].
Storage-wise, I have one harddrive for the system installation, and two identical hard drives (4TB each) making a RAID drive, for the data.
Installation
Installing the Server
After downloading the ISO, and “flashing” it to a USB key, I did boot it, and went through the installation wizard; selecting the language and the keyboard map, adding root password and defining a new user with password. It’s worth mentioning here that I used the “Automatic” partitioning option for the hard-drive.
In the Software Selection section, I checked the “Headless Management” tools, which will help in completing the configurations later.
Under Network and Host Name I have changed the host name to my liking. This name will be used later to access the server, and most of its services through web interfaces, as well as other protocols, like Samba Sharing.
Waiting the installation to complete, let’s plan ahead what we need.
- Apache with PHP and mySql (mariaDB) – I use this as my development machine for php web sites.
- EMBY or similar, with DLNA media server .. this server does save media to my home network devices
- SMB file and printer sharing .. The server also serves the purpose of a file-server on the network, besides, there’s a printer attached to it, which we all print to through the server itself.
- NextCloud .. I use nextCloud as my main cloud storage service, hosting it at home on my server .. The problem is, I’m not sure how I am going to migrate my existing NextCloud installation with all its files and permissions to the new installation. Bearing in mind that my original hard drive is not accessible anymore, I assume this one would be tricky.
- Setup SSH with custom port and password-less authentication.
- Setup Webmin for easier administration tasks.
- Setup a git server, and migrate my existing git repo’s to the new installation. I don’t think this is as tricky as migrating NextCloud installation, though.
OK .. now that the fedora server has been installed, it’s time to move to the next step.
System Update
First thing after installing the server is to do a system update. Simply, log in and:sudo dnf update
Note:
As we have selected to include the headless management tools in our installation, Fedora is ready for SSH connections on port 22.
Cockpit
After updating the system, let’s do a quick look at what we have out of the box.
Out of the box, fedora server provides two important remote management tools, SSH and Cockpit.
You can access the SSH from any other computer at port 22, buy default. I shall be changing that soon.
You can access cockpit through a web browser with the server IP address, and port 9090, in my casehttps://192.168.1.101:9090
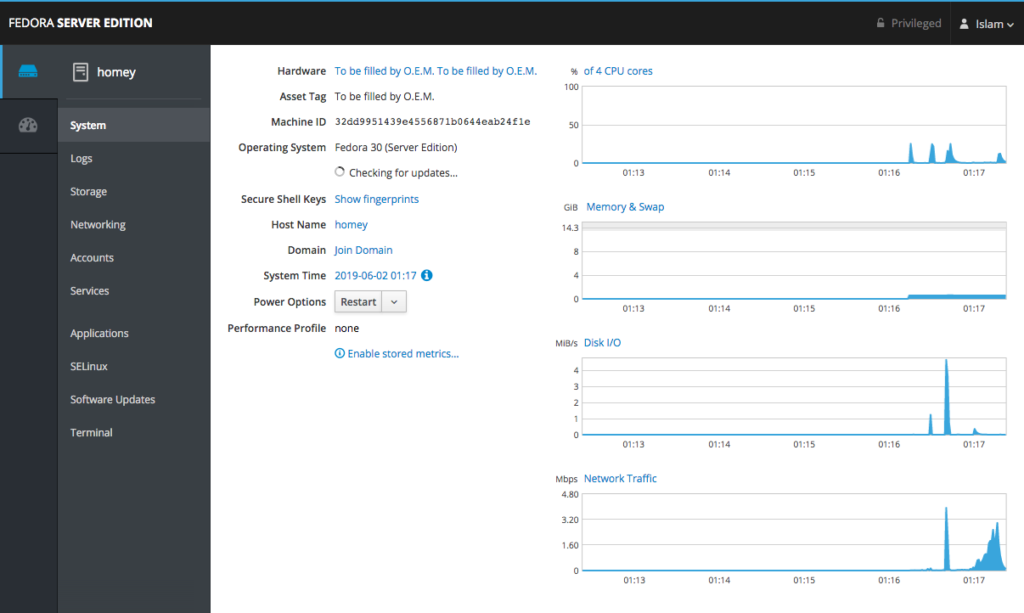
Cockpit is a lovely web-based GUI tool to manage your headless server. I will be using it in many tasks, including reconnecting my RAID, and mounting it.
SELINUX
Selinux is known for being hard to configure. For simplicity, I will start my journey by disabling selinux, then after making sure everything is working, I will enable it back, and work my way through it, one service after the other.
To disable it,sudo nano /etc/selinux/config
Then changing:SELINUX=enforcing
toSELINUX=disabled
I prefer rebooting the whole system at this point:sudo reboot -f
Webmin
Next, it is time for Webmin.
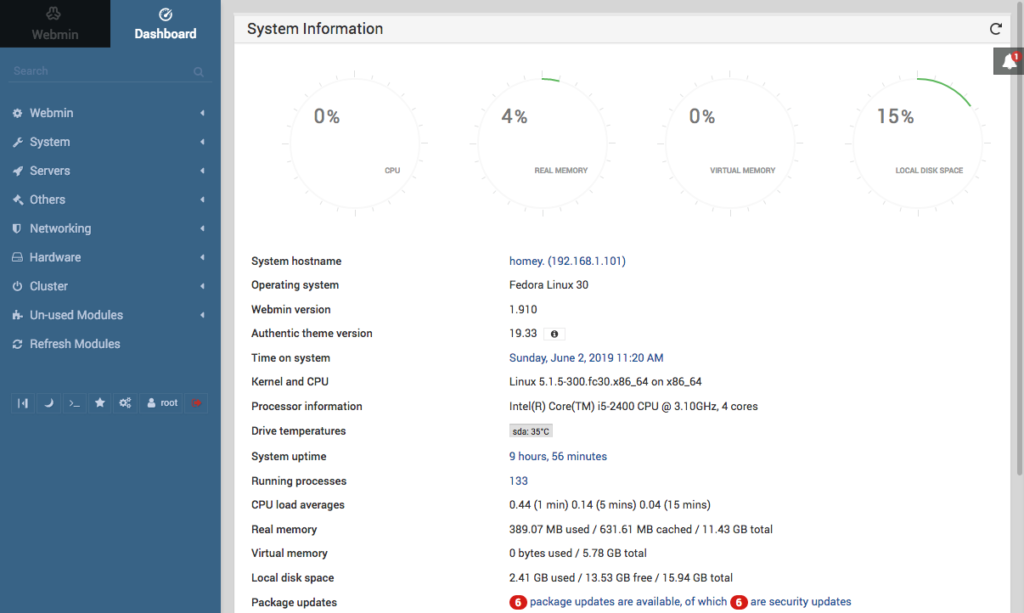
Webmin is another web-based GUI application specifically design to manage headless servers. I’m used to working with webmin for some years now, and I will need it in some tasks. Configuring some services is much easier with it.
Now, there are two ways to install webmin on Fedora, either through the rpm, or by adding the webmin repository and then installing webmin using the normal dnf install procedure.
To do so, first one needs to add the repository information to a file in the/etc/yum.repos.d/
I’ll call it webmin.repo, which will be as follows:
[Webmin]
name=Webmin Distribution Neutral
mirrorlist=https://download.webmin.com/download/yum/mirrorlist
enabled=1
Next we need to obtain the signature, then import it into rpm, I’m going to create a Downloads folder in my home directory and download the file in it:
mkdir ~Downloads
cd ~Downloads
wget http://www.webmin.com/jcameron-key.asc
Then, import the signature to rpm:sudo rpm —import jcameron-key.asc
Now, let’s update, and then install webmin:
sudo dnf update
sudo dnf install webmin
, and let’s add its port to the firewallsudo firwall-cmd --add-port=10000/tcp --permanent
Then reload the firewall so the new changes take effect.sudo firewall-cmd --reload
To open the webmin, from a web browser, we enter the server hostname and the webmin port, in my case https://homey:10000, note that I am using my hosts file in my desktop to point the name homey to the actual IP address of the server.
Also, you must note that webmin will only allow root to log in, until other logins are added from within the webmin interface.
NOTE
At times, webmin would stop working after the first reboot post installing it. In such case, first thing to try is restarting it:sudo /etc/init.d/webmin restart
Configuring the RAID
As I have mentioned, I have a RAID-0 setup for my storage. During the installation, I have physically disconnected these drives, to avoid any human mistakes during installation.
Now it’s time to re-attach them, and configure the RAID matrix, by first shutting down the server, and physically reconnecting the drives.
After physically connecting the drives, we need to mount them. I mount my RAID matrix in the /srv directory, which serves as the base point of all my data. I think the fastest way to achieve that is using cockpit:
From Storage I can see the RAID-0 device shown and not mounted anywhere. It’s also apparent that it came from an Arch system.
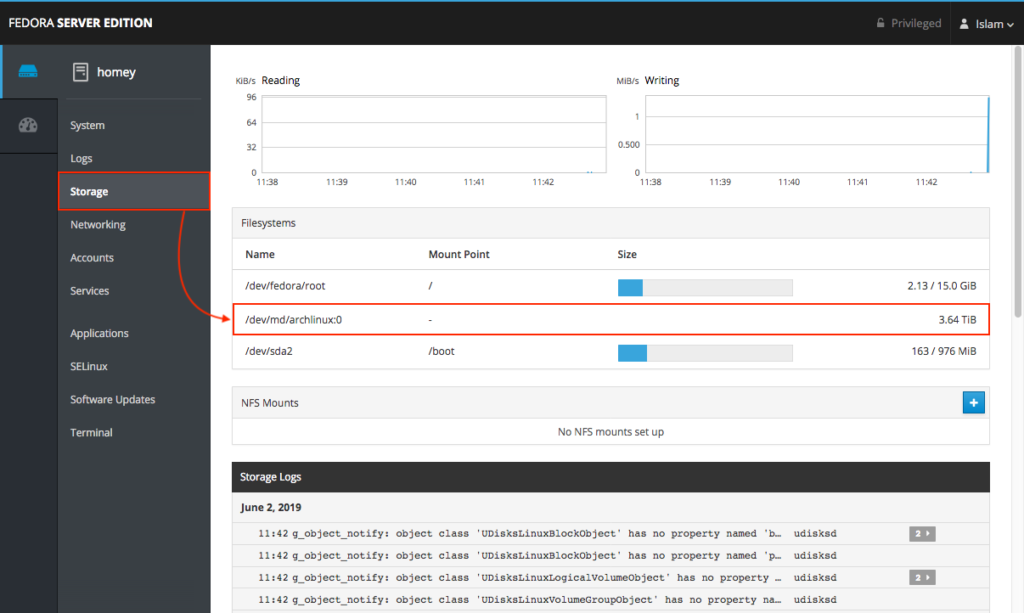
Clicking on that entry, cockpit displays more details on the RAID configuration, and provides a quick mounting option (under Content).
Clicking on the mount point link, then entering a custom mount point (/srv) in this case, then APPLY and MOUNT does the trick.
UIDs and GIDs
Taking a look into the /srv and checking the files and directories there, it is apparent that some work needs to be done for the groups and users IDs. *nix systems assign the ownership and the permissions for files and folders using the users IDs and groups IDs. Hence, on a new system, the users and groups might not map correctly to the old ones.
For example, in my old system, my user ID was 1001, and my private group ID was 1001. In the new system, my user was assigned 1001, while my group was assigned 1000. This goes for the rest of the users and groups.
There are two ways to tackle this
- maintain the original IDs for users and groups,
- change the ownerships of the directories and files to the new IDs
I went with the first choice, to avoid the hassle of fixing some of the permissions on some folders.
So, for example, I changed my group ID to 1001:sudo groupmod -g 1001 islam
Another example is the nobody group. I use the nobody user and group as an owner on my public samba shares. These are files shared and accessible throughout my internal network for anyone, without authentication.
Looking through the File Manager of Webmin, I can see that the public shared folder is owned by user 99 and group 99

This is the old user and group IDs for nobody:nobody
hence, let me change the IDs of the new nobody user and group to be 99:
sudo groupmod -g 99 nobody
sudo usermod -u 99 nobody
Now, it looks like this:

The same method shall be followed whenever there is a need for fixing users and/or groups IDs
LAMP Stack
Next step is installing a LAMP stack. LAMP short for Linux, Apache, MySql and PHP. This is what I use for developing most of the web sites, and some other tools.
Since we already have the Linux installed, let’s move to Apache.
Apache
One difference to note between Arch and Fedora, is that the default user:group for Apache is http:http for Arch, and apache:apache for Fedora. At first, I thought to change the Apache default user name from apache to http to match what I am used to, but then I thought out of it. It would create confusion on the long run, especially when reading online articles or forums discussions on Fedora. Hence, I’m going to leave it as apache. But I’m going to give it the same GID as the previous installation.
Let’s install Apachesudo dnf install httpd
After installing, we need to change the default document directory from /var/www/html to our own /srv/http by editing /etc/httpd/conf/httpd.conf :sudo nano /etc/httpd/conf/httpd.conf
By changing DocumentRoot from /var/www/html to /srv/http
We don’t need the following Directory options, so will comment it out
<Directory “/var/www/”>
    AllowOverride None
    # Allow open access:
    Require all granted
</Directory>
To
#<Directory "/srv/http">
#    AllowOverride None
# Allow open access:
#    Require all granted
#</Directory>
Then in the Directory options for /var/www/html, I am going to modify it to be:
<Directory "/srv/http">
    Options Indexes FollowSymLinks
    AllowOverride None
    Require all granted
</Directory>
Also, we shall change the ScriptAlias directive:ScriptAlias /cgi-bin/ “/var/www/cgi-bin/“
ToScriptAlias /cgi-bin/ "/srv/http/cgi-bin/"
Along with its Directory options
<Directory "/var/www/cgi-bin">
    AllowOverride None
    Options None
    Require all granted
</Directory>
To be:
<Directory "/srv/http/cgi-bin">
    AllowOverride None
    Options None
    Require all granted
</Directory>
Now, we save (ctrl+o) and exit nano editor (ctrl+x)
Next, we need to add the http and the https services to firewallsudo firewall-cmd --add-service={http,https} --permanent
And reload the firewallsudo firewall-cmd --reload
Now, let’s change the UID and GID for apache:apache to match the previous installation (985)
sudo groupmod -g 985 apache
sudo usermod -u 985 apache
Start the apache httpd service, and enable it so it starts automatically every time the server is rebooted:sudo systemctl enable --now httpd
To test our installation, from any web browser, we either enter the server’s IP address, or name. In my case:http://192.168.1.101/
Orhttp://homey/

If there is no index.html in the document root, the Fedora Test Page is shown. Otherwise, the index.html page shall be displayed.
PHP
Now that we’re done with installing apache, it’s time to install php and any required extensions we might need. For me, the extensions I currently need are:
- php-mcrypt
- php-mysqlnd
- php-curl
- php-gd
- php-xml
- php-zip
Hence, I install php and the listed extensions:sudo dnf install php php-mcrypt php-mysqlnd php-curl php-gd php-xml php-zip
One thing to do after installing is setting the time-zone in the /etc/php.ini and then restarting apache for the changes to take effect.
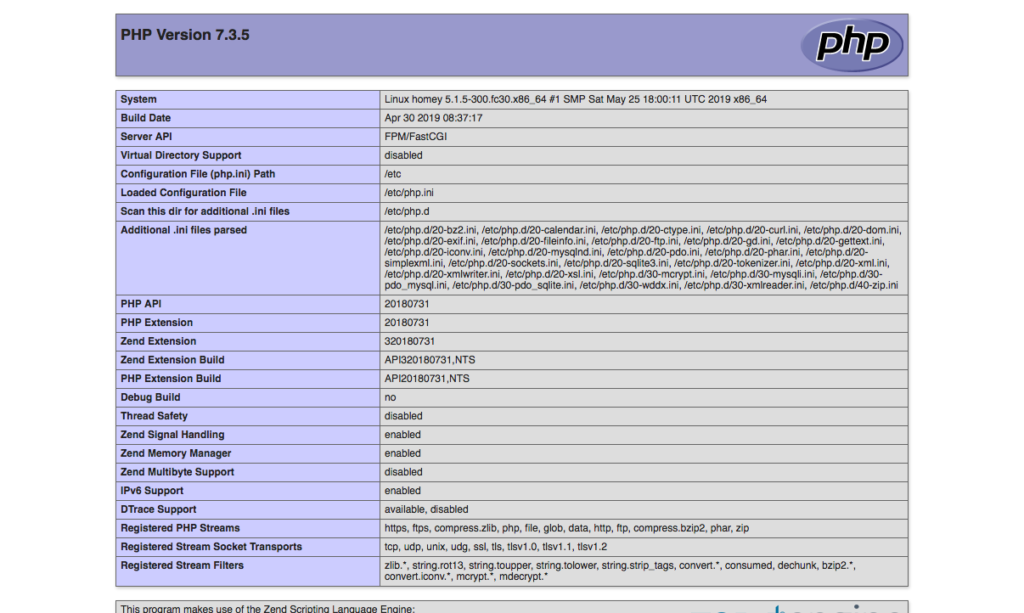
To test the php installation, let’s create a /srv/http/test.php file, with the following content, in the:
<?php
phpinfo();
?>
If everything went as expected, directing the browser to that file http://192.168.1.101/test.php will result in the following output.
MariaDB
mariaDB is the official provider for the mySql service in Fedora, and most linux distros. To install mariaDB:sudo dnf install mariadb-server
We need to enable and start the database server, next:sudo systemctl enable --now mariadb
Then to run the mysql_secure_installation script:sudo mysql_secure_installation
It is a simple wizard to help you setup your database server environment.
After installation, I would like to change the data storage directory datadir to point somewhere in the /srv, which is the RAID-0 storage. This helps in cases of system failures, like the issue that led to switching from my previous Arch to the new Fedora Server and it provides a larger storage space for future expansions.
Let’s first stop the database servicesudo systemctl stop mariadb
In /etc/my.cnf.d/mariadb-server.cnf we need to change the values in the [mysqld] section, as follows:
[mysqld]
datadir=/srv/mysql
socket=/srv/mysql/mysql.sock
log-error=[NO CHANGE]
pid-file=[NO CHANGE]
Optionally, set the default database encoding in the /etc/my.cnf.d/mariadb-server.cnf – [mysqld] section:
[mysqld]
    character-set-server=utf8
And finally, we need to tell mysql client of the new socket location, add the following section in the /etc/my.cnf
[client]
port=3306
socket=/srv/mysql/mysql.sock
Now let’s create the mysql directory and give it the proper permissions and ownership. mysql directory is owned by mysql:mysql and should have permissions 0755. The mysql directory is a child of a directory owned by root:root which is the /srv directory itself in our case.
sudo mkdir /srv/mysql
sudo chown mysql:mysql /srv/mysql
sudo chmod 0755 /srv/mysql
Next, copy recursively the content of the old data directory to the new one:sudo cp -R -p /var/lib/mysql/* /srv/mysql
Additionally, let’s create a symlink to the new mysql.sock in the original location. This is helpful with some applications that try to access the default socket location:sudo ln -s /srv/mysql/mysql.sock /var/lib/mysql/mysql.sock
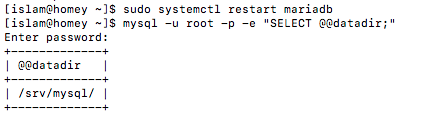
With that, let’s start the mariadb service again:sudo systemctl start mariadb
You can check the data directory has successfully changed:mysql -u root -p -e "SELECT @@datadir;"
Finally, to enable remote access to the database through the firewall, if needed, we should add port 3306:sudo firewall-cmd --add-port=3306/tcp --permanent
And don’t forget to reload the firewall:sudo firewall-cmd --reload
Depending on your answers to the mysql_secure_installation script, root database user might be not able to access the database remotely. Hence you might need to create a new user to the database through the terminal, allowing him to access the database from everywhere.
BONUS: Installing phpMyAdmin
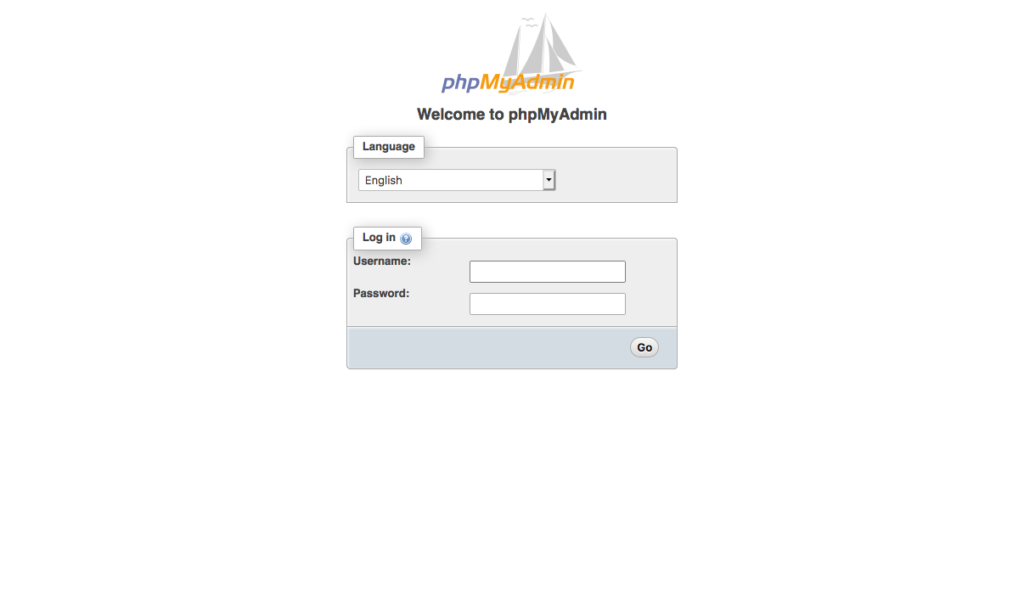
phpMyAdmin is a web-based database management application that provides a visual graphical user interface to perform all the task you need as a database admin.
To install phpMyAdmin on our newly installed Fedora Server:sudo dnf install phpmyadmin
By default, phpMyAdmin allows connections from localhost only, that is 127.0.0.1. To enable the rest of the computers on the local network to access phpMyAdmin, we need to modify the file /etc/httpd/conf.d/phpMyAdmin.conf, adding 192.168.1.0/24 after require ip 127.0.0.1 in both lines 17 and 34, to be:require ip 127.0.0.1 192.168.1.0/24
Now, from any web browser, visithttp://192.168.1.101/phpmyadmin/
Note: if you get an error message like this

Make sure you symlink the original location for mysql.sock to the new one, as explained above.
Installing Samba (SMB Server)
Install the package samba, enable and start it, then allow it through the firewall
sudo dnf install samba
sudo systemctl enable --now smb nmb
sudo firewall-cmd --add-service=samba --permanent
sudo firewall-cmd --reload
To make things a bit easier, I will utilize Webmin to configure samba shares and configurations.
Jellyfin Media Server
I have been using emby media server for years, but with the latest development in violation of the GPL licenses, and by introducing intrusive ads and tries to push users into their paid services, the open source fork Jellyfin is the new choice for media server purposes.
At the time of writing this, jellyfish does not have a repo for fedora, yet, but they provide a .rpm file.
Jellyfin requires ffmpeg. So, we need to install rpmfusion repo, first:sudo dnf -y install [https://download1.rpmfusion.org/free/fedora/rpmfusion-free-release-$](https://download1.rpmfusion.org/free/fedora/rpmfusion-free-release-$) (rpm -E %fedora).noarch.rpm
Now, downloading the .rpm and installing it is as easy as:
wget https://repo.jellyfin.org/releases/server/fedora/jellyfin-10.3.3-1.fc29.x86_64.rpm
sudo dnf localinstall jellyfin-10.3.3-1.fc29.x86_64

sudo firewall-cmd --add-port=8096/tcp --permanent
sudo firewall-cmd --reload

sudo systemctl enable --now jellyfin
Note: at the time of writing jellyfin-10.3.3-1.fc29.x86_64.rpm is the latest rpm for jellyfin. Check [GitHub - jellyfin/jellyfin: The Free Software Media System](https://github.com/jellyfin/jellyfin) for any newer versions, or even the fedora repository.
Next, from the web browser, navigate to the server address with port 8096, and follow the step-by-step wizard.
Transmission
I use it a lot, hence it must be installed. This is the headless transmission server.
Install itsudo dnf install transmission-daemon
After installing, we need to adjust a few configurations. The transmission-daemon configurations are in the file /var/lib/transmission/.config/transmission-daemon/settings.json
I will keep all settings at default values, except for the rpc-whitelist which is a list of ip’s that are allowed to access the web interface of transmission server. I will allow all from my internal network:
Open the settings.json, and change the "rpc-whitelist value as below:"rpc-whitelist": "192.168.1.*"
Then save the file.
Enable and startsudo systemctl enable --now transmission-daemon
Allow it through the firewall
sudo firewall-cmd --add-port=9091/tcp --permanent
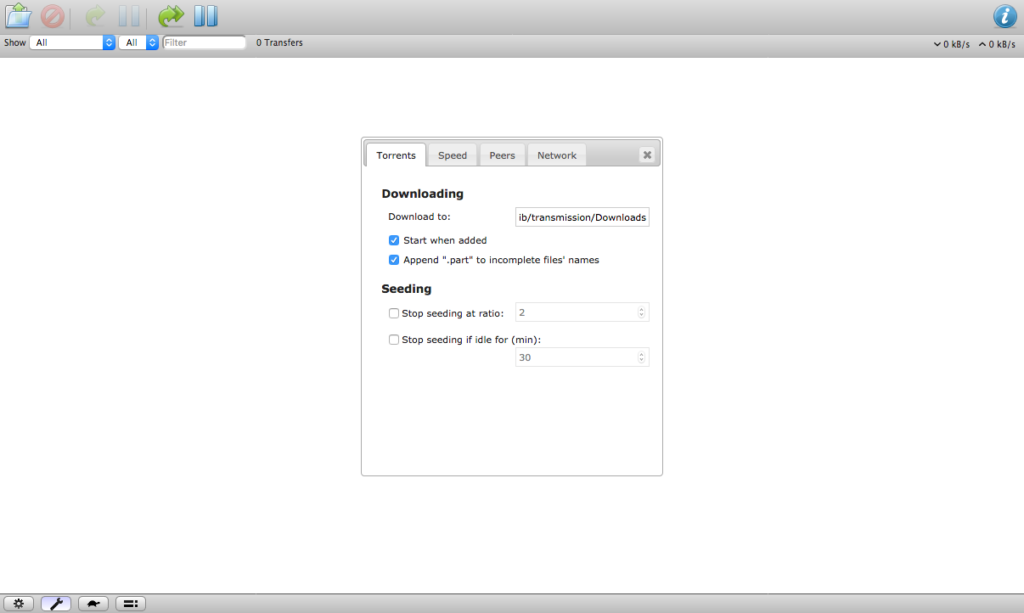
sudo firewall-cmd --reloadTransmission web interface can be accessed through a web browser with the server’s IP address and port 9091:http://192.168.1.101:9091/
From the web interface the rest of the configuration can be done, such as the download folder, and the scheduled low bandwidth times .. etc.
NextCloud
Migrating a nextCloud installation requires having the original database, which is not possible in my case. But, since This is a home server, with very few users, and since the actual files are available, the best course of action to install nextCloud, setup the users, and then move the files into the users folders. This will require complete re-sync with the different clients, but it seems like the best course of action for the situation at hand.
First step is to actually setup nextCloud. For safety, I will rename the nextCloud data folder (/srv/nCloudFiles/) to something else, so I can move the files from it later to the new installation folder.
sudo mv /srv/nCloudFiles /srv/nCloudFiles.old
Then create a new directory, and set its owner to apache:apache (nextCloud works through the apache http service)
sudo mkdire /srv/nCloudFiles
sudo chown apache:apache /srv/nCloudFiles
Next, let’s check and install the php modules that are required for nextCloud to run correctly. Based on the official documentation, these are (checked items are already installed and enabled through the previous installation steps):
Required
The modules marked here have been already installed in the previous stages.
- [x] * PHP (>= 7.0, 7.1 or 7.2)
- [x] PHP module ctype
- [x] PHP module curl
- [x] PHP module dom
- [x] PHP module GD
- [x] PHP module iconv
- [x] PHP module JSON
- [x] PHP module libxml (Linux package libxml2 must be >=2.7.0)
- [x] PHP module mbstring
- [x] PHP module openssl
- [x] PHP module posix
- [x] PHP module session
- [x] PHP module SimpleXML
- [x] PHP module XMLReader
- [x] PHP module XMLWriter
- [x] PHP module zip
- [x] PHP module zlib
Recommended
- [x] PHP module fileinfo
- [x] PHP module bz2
- [x] PHP module intl
- [x] PHP module exif
- [ ] PHP module apcu
- [ ] PHP module memcached
- [ ] PHP module redis
- [ ] PHP module imagick
and for some of my apps and viewers the following are required
- [ ] PHP module ldap
- [ ] PHP module imap
- [x] ffmpeg
- [ ] OpenOffice or LibreOffice
Lets start with installing the missing PHP modules:sudo dnf install php-apcu php-memcached php-redis php-imagick php-ldap php-imap
Also, to enable viewing and editing office documents from within the nextCloud web interface, which is something I need to do sometimes, we’ll need to install LibreOffice or OpenOffice. I prefer LibreOffice.
So, let’s install it. Because this is a headless server, anyway, I opted to install LibreOffice without weak dependencies:sudo dnf --setopt=install_weak_deps=False --best install libreoffice
Additionally, we need to increase the maximum file size upload by httpd/php to something larger than the default value, to make it practical to work with nextCloud. In /etc/php.ini find upload_max_filesize and post_max_size and increase them to something like 6G, for example.
Now that we have all the dependencies we need in place, let’s install and configure nextCloud.
sudo dnf install nextcloud
Next, we need to create a database, a database user and password for nextCloud usage — this can either be done from the terminal, or through something like phpMyAdmin (since I already have that installed).
mysql -u root -p
CREATE DATABASE nextcloud;
CREATE USER 'nextcloud'@'localhost' IDENTIFIED BY 'nextcloudpassword';
GRANT ALL ON nextcloud.* TO 'nextcloud'@'localhost';
To exit the mysql prompt, type exit; or q then enter.
With the database ready, we can now run the nextCloud install script. This is run as the user apache. From the nextCloud directory (/usr/share/nextcloud/)sudo -u apache php occ maintenance:install --data-dir /srv/nCloudFiles/ --database "mysql" --database-name "nextcloud" --database-user "nextcloud" --database-pass "nextcloudpassword" --admin-user "admin" --admin-pass "adminpassword"
NOTE:
When changing the default nextCloud data directory, there is a bug in the installation script that results in the following error message:PHP Fatal error: Declaration of OCFilesStorageLocal::copyFromStorage(OCPFilesStorage $sourceStorage, $sourceInternalPath, $targetInternalPath) must be compatible with OCFilesStorageCommon::copyFromStorage(OCPFilesStorage $sourceStorage, $sourceInternalPath, $targetInternalPath, $preserveMtime = false) in /usr/share/nextcloud/lib/private/Files/Storage/Local.php on line 43
This is basically due to the commission of the parameter $preserveMtime in the copyFromStorage php function. To fix this, edit the /usr/share/nextcloud/lib/private/Files/Storage/local.php adding the parameter to the copyFromStorage, with default value of false. This ensures that any calls to the functions in other scenarios will be processed in the same default behavior. So, the function definition should be:
public function copyFromStorage(OCPFilesStorage $sourceStorage, $sourceInternalPath, $targetInternalPath, $preserveMtime = false) {Reaching this stage, nextCloud is installed and running, but only accessible from the Fedora Server box itself, we need to change that, add the trusted domains and enable memory cache.
NOTE: Trusted Domains
By default, nextCloud instant is called within the browser using (http://localhost/nextcloud/) – in which case the trusted domain is localhost. When calling nextCloud through, say, the server’s external IP address, domain name, or even internal IP address, nextcloud will show an error message. This is a security feature of nextcloud. In my use case, and since I access nextCloud from both within the home network, and from outside through the internet, I use the hosts file to point to the correct IP address, be it 192.168.1.101 for home use, or whatever the external IP address is when I am outside. This makes it possible to work with nextCloud client on my laptop without the hassle of setting up a loopback on my home router, or going through issues with nextCloud desktop client for changing the server address every time I’m outside or back inside the house.
Editing /usr/share/nextcloud/config/config.php :
Adding the server alias I’m using to the trusted_domains array:
'trusted_domains' =>
  array(
        0 => 'localhost',
        1 => 'homey'),
And enabling memory cache by adding the below entry at the end of the $CONFIG array:'memcache.local' => '\OC\Memcache\APCu',
NOTE:
At times you would need to change the dbhost entry to 127.0.0.1 instead of localhost. If you face issues with the database access, try that as a workaround.
And finally, allow nextCloud to accept connections from any host, by copying (or linking) the configuration file /etc/httpd/conf.d/nextcloud-access.conf.avail to /etc/httpd/conf.d/z-nextcloud-access.conf
sudo ln -s /etc/httpd/conf.d/nextcloud-access.conf.avail /etc/httpd/conf.d/z-nextcloud-access.conf
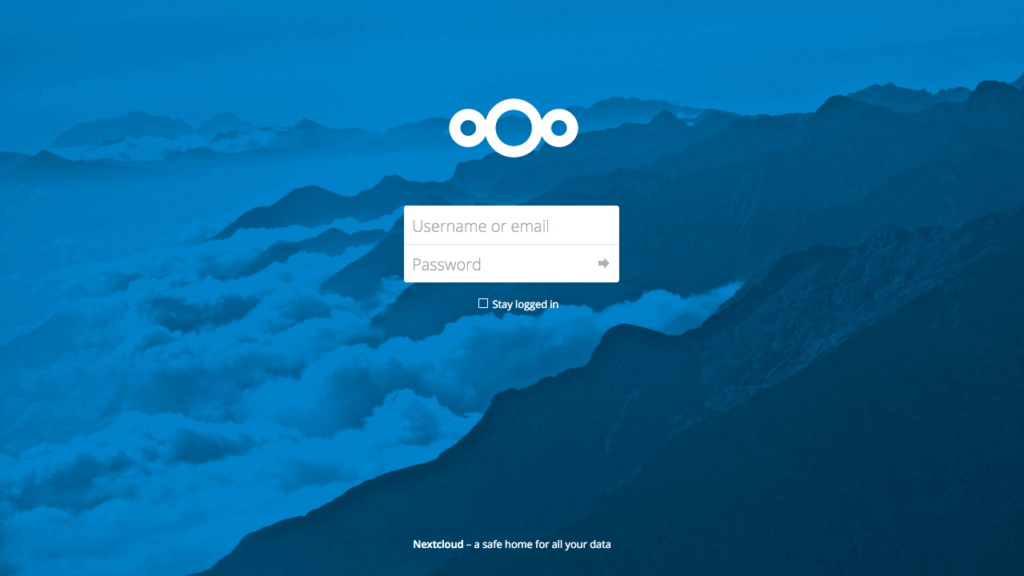
Now, restart apache server, and open the nextCloud from your browser at http://SERVER/nextcloud/, in my case this is http://homey/nextcloud and complete adding the users you need.
[OPTIONAL] Some Recommended Configurations for nextCloud
If you want to get the best of nextCloud with mySQL (mariadb) nextCloud documentations recommends enabling 4-byte support, as explained here.
To do so, and since I am using mariadb a version later than 10.3, edit the /etc/my.cnf.d/mariadb-server.cnf, making sure:
[mysqld]
innodb_file_per_table=1
Then, restart the mariadb server:sudo systemctl restart mariadb
Furthermore, we need to change the nextcloud database character set and collation (using mysql -u root -p):ALTER DATABASE nextcloud CHARACTER SET utf8mb4 COLLATE utf8mb4_general_ci;
Then tell nextCloud to set the mysql.utf8mb4 config to truesudo -u apache php occ config:system:set mysql.utf8mb4 --type boolean --value="true"
We can now run the nextCloud repair, for the updates to take effect on the database table:sudo -u apache php occ maintenance:repair
NOTE:
It is important to note that backing up the database using mysqldump now requires forcing the --default-character-set=utf8mb4 for the data dump to be correct, and for the restoring process at later times.
Restoring the nextCloud Files
At this point, the nextCloud instant is installed and running correctly, accepting connections through the network. With the users set as they were, it’s time to restore the files back into place. I have rename the old nextcloud data directory earlier, and also have rsync’ed the contents of it before renaming to my other machine. I need to check whether a directory copy would be sufficient, or do I need to actually rsync the data back to the users’ nextcloud data directories. I will start with the easier solution, in hope it works fine.
sudo cp -r --preserve=all /srv/nCloudFiles.old/{user} /srv/nCloudFiles/
This is to be repeated for every user. Note that the user must have been created and logged in before copying the original files in place.
Also, remember to chown the restored files to apache:apache.
After all the required files have been restored, let’s do a files scan to register the file system changes into the nextcloud database:
From within the nextcloud director /usr/share/nextcloud:sudo -u apache php occ files:scan --all
Depending on the number of users and the size of data, this might take some time.
Securing and Configuration
SSH
First thing I would do is change the SSH port from the default to something custom, say 2233.
The easiest way to do it, is via webmin -> servers -> SSH Server -> Edit Config Files
Or simply by updating the value of port in the /etc/ssh/sshd_config
Next, add the new port to the firewall:
sudo firewall-cmd --add-port=2233/tcp —permanent
sudo firewall-cmd --reload